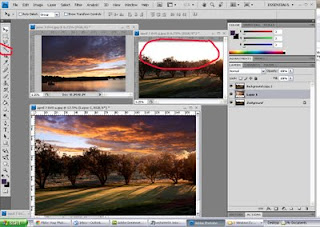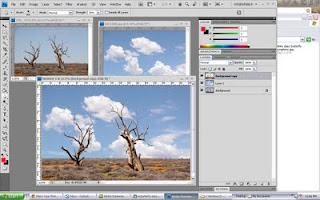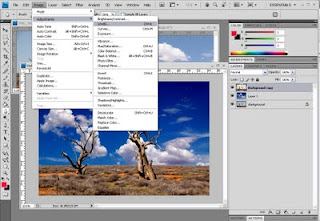
At the June meeting I did a tutorial on "Adding Skies".
Here is an overview of the process for those who could not attend.
- Choose two images that compliment each other.
- Make a copy of the background of your main image by RIGHT clicking your mouse on the LAYER named background in the drop down menu on the right of the screen and choose DUPLICATE LAYER.
- Go to the SKY image and select the whole image .... either by using the rectangular marquee tool or by holding down CTRL and A.
- Copy the SKY and paste it on to your background.
- Drag the SKY layer so that it is sandwiched between the background and background copy layers.
- Use the MAGIC WAND tool and select the sky on the top layer.... the area will be surrounded by dashed lines... If it is not all selected adjust the Tolerance on the top tool bar and try again.
- RIGHT click on the selected area and choose FEATHER and adjust to between .5 and 1... this makes a softer edge.
- CUT , DELETE or ERASE the area.
- To deselect ( remove the dashed lines) hold down CTRL and D.
- Adjust the LEVELS of each layer to your preference.... go to IMAGE - ADJUST - LEVELS and a move the arrow to adjust light and shade.
- REMEMBER to merge or flatten layers before you save your new image. LAYERS ... FLATTEN IMAGE.


No comments:
Post a Comment